1. 定义 ShaderPainter 在 Flutter 中使用自定义着色器需要创建一个 CustomPainter 的子类并重写 paint 方法,该方法会再需要重新绘制时被调用。然后在该方法中将 FragmentShader 着色器实例传递给 Paint 类实例来进行绘制,例如:
class ShaderPainter extends CustomPainter {
  final FragmentShader shader;

  ShaderPainter(this.shader);

  @override void paint(Canvas canvas, Size size) {
    canvas.drawRect(
      Rect.fromLTWH(0, 0, size.width, size.height),
      Paint()..shader = shader,
    );
  }

  @override bool shouldRepaint(covariant CustomPainter old) {
    return old != this;
  }
}
创建一个StatefulWidget 来显示自定义的 ShaderPainter。AnimationController。
class _LoadingWidgetState extends State<LoadingWidget> with TickerProviderStateMixin {
    int _startTime = 0;
    double get _elapsedTimeInSeconds => (DateTime.now().millisecondsSinceEpoch - _startTime) / 1000;

    late final AnimationController _controller;

    @override void initState() {
        super.initState();
        _controller = AnimationController(
            duration: const Duration(seconds: 10),
            vsync: this,
        )..repeat();
    }

    @override void dispose() {
        _controller.dispose();
        super.dispose();
    }

    @override Widget build(BuildContext context) { ... }
}
3. 通过 FutureBuilder 异步加载像素着色器 使用以下代码加载着色器 GLSL 程序,并将其传递给 CustomPaint 控件:
FragmentProgram program = await FragmentProgram.fromAsset('shaders/hellow.frag');
FragmentShader shader = program.fragmentShader();
由于着色器的加载是一个异步操作,可以将其与加载状态一起放在一个 FutureBuilder 中,同时通过 FragmentShader 的 setFloat 方法为着色器传递参数,例如时间、分辨率等:
SizedBox(
  width: MediaQuery.of(context).size.width,
  height: MediaQuery.of(context).size.height,
  child: FutureBuilder<FragmentShader>(
    future: FragmentProgram.fromAsset('shaders/loading.frag').then((program) {
      return program.fragmentShader();
    }),
    builder: (context, snapshot) {
      if (snapshot.hasData) {
        final shader = snapshot.data!;
        shader
          ..setFloat(1, width)   // iResolution.x
          ..setFloat(2, height); // iResolution.y

        return AnimatedBuilder(
            animation: _controller,
            builder: (context, child) {
              shader.setFloat(0, _elapsedTimeInSeconds); // iTime
              return CustomPaint(
                painter: ShaderPainter(shader),
              );
            });
      } else {
        return const CircularProgressIndicator();
      }
    },
  ),
);
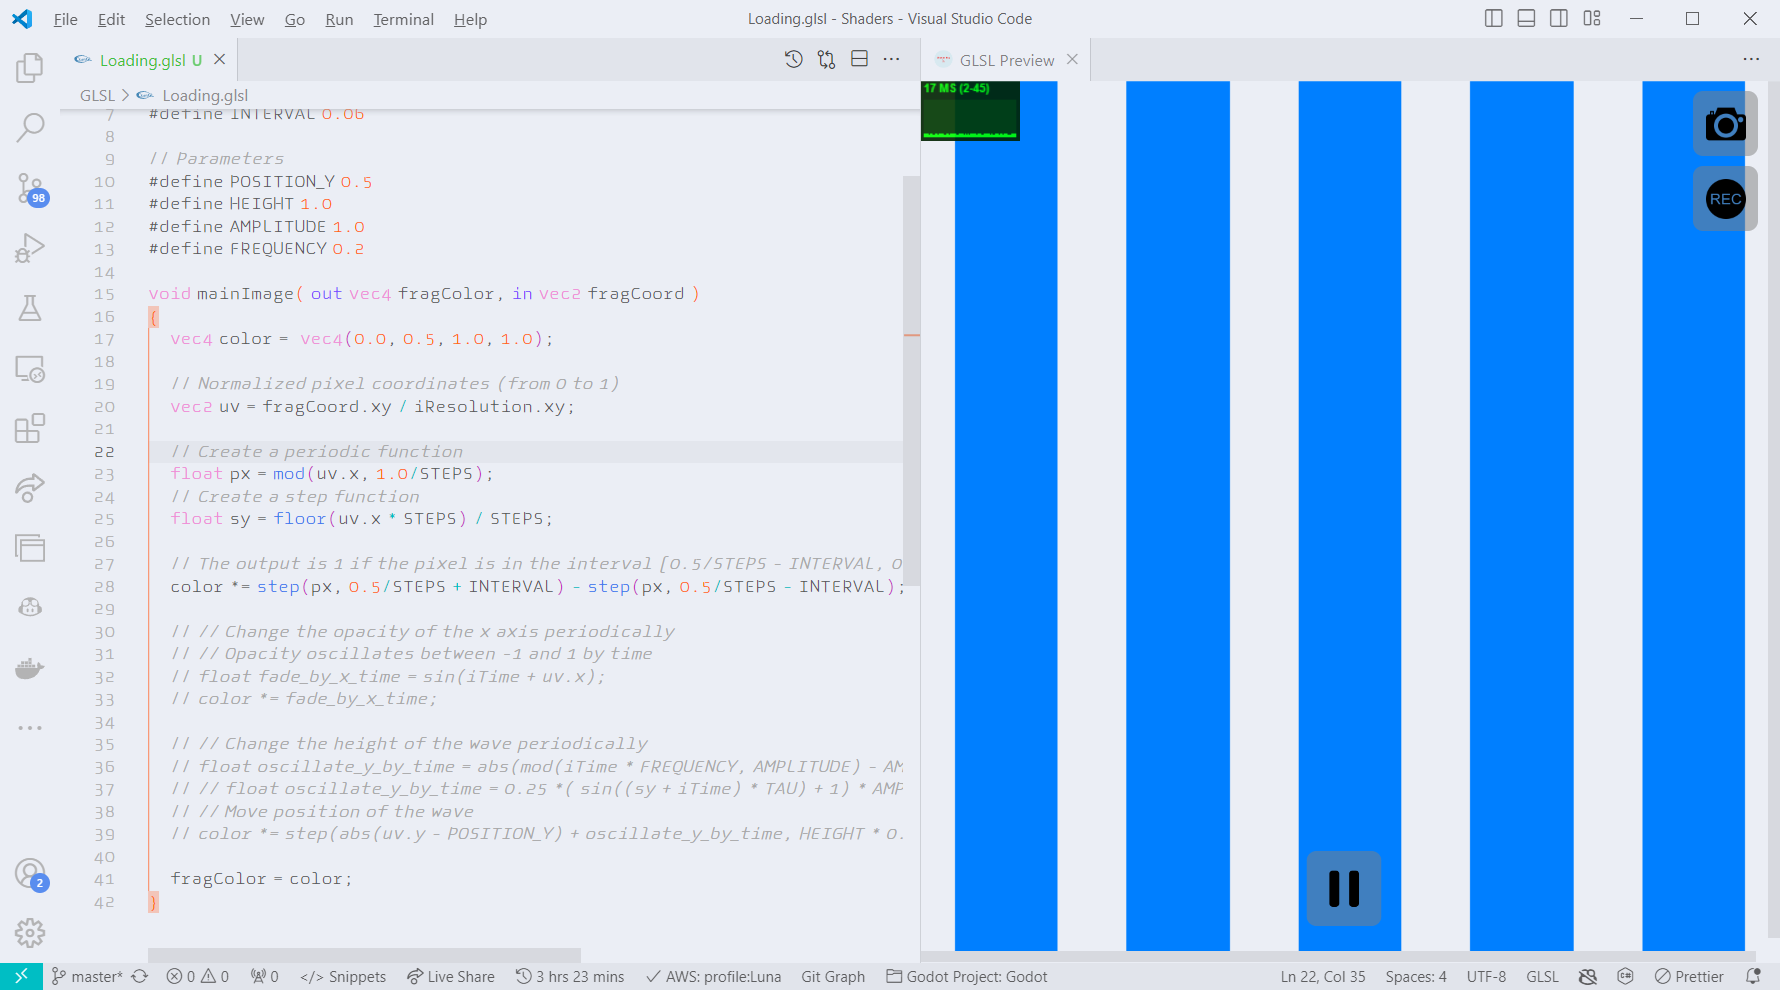
4. Shader 程序 out vec4 fragColor;
precision highp float;
uniform float iTime;         // shader playback time (in seconds)
uniform vec3  iResolution;   // viewport resolution  (in pixels)
// Constants
#define PI 3.1415925359
#define TAU 6.2831852
// Parameters
#define STEPS 5.0
#define INTERVAL 0.06
#define POSITION_Y 0.5
#define HEIGHT 1.0
#define AMPLITUDE 1.0
#define FREQUENCY 0.2
void main()
{
vec4 color = vec4(0.0, 0.476, 1.0, 1.0);
// Normalized pixel coordinates (from 0 to 1)
vec2 uv = gl_FragCoord.xy / iResolution.xy;
// Create a periodic function
float px = mod(uv.x, 1.0/STEPS);
// Create a step function
float sy = floor(uv.x * STEPS) / STEPS;
// The output is 1 if the pixel is in the interval [0.5/STEPS - INTERVAL, 0.5/STEPS + INTERVAL]
color *= step(px, 0.5/STEPS + INTERVAL) - step(px, 0.5/STEPS - INTERVAL);
// Change the opacity of the x axis periodically
// Opacity oscillates between -1 and 1 by time
float fade_by_x_time = sin(iTime + uv.x);
color *= fade_by_x_time;
// Change the height of the wave periodically
float oscillate_y_by_time = abs(mod(iTime * FREQUENCY, AMPLITUDE) - AMPLITUDE * 0.5) * (0.5 * sin((sy + iTime) * TAU) + 0.5);
// Move position of the wave
color *= step(abs(uv.y - POSITION_Y) + oscillate_y_by_time, HEIGHT * 0.5);
fragColor = color;
}
1 声明两个变量 :iTime 和 iResolution,作为 flutter 侧传递给着色器程序的外部变量:
uniform float iTime; // shader playback time (in seconds)
uniform vec3 iResolution; // viewport resolution (in pixels)
2 归一化坐标系
GL 的坐标系默认以像素为单位,所以需要将原本的坐标除以视口大小,以得到 uv 坐标系:
vec2 uv = gl_FragCoord.xy / iResolution.xy;
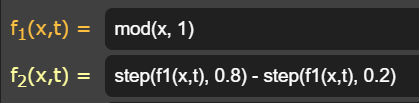
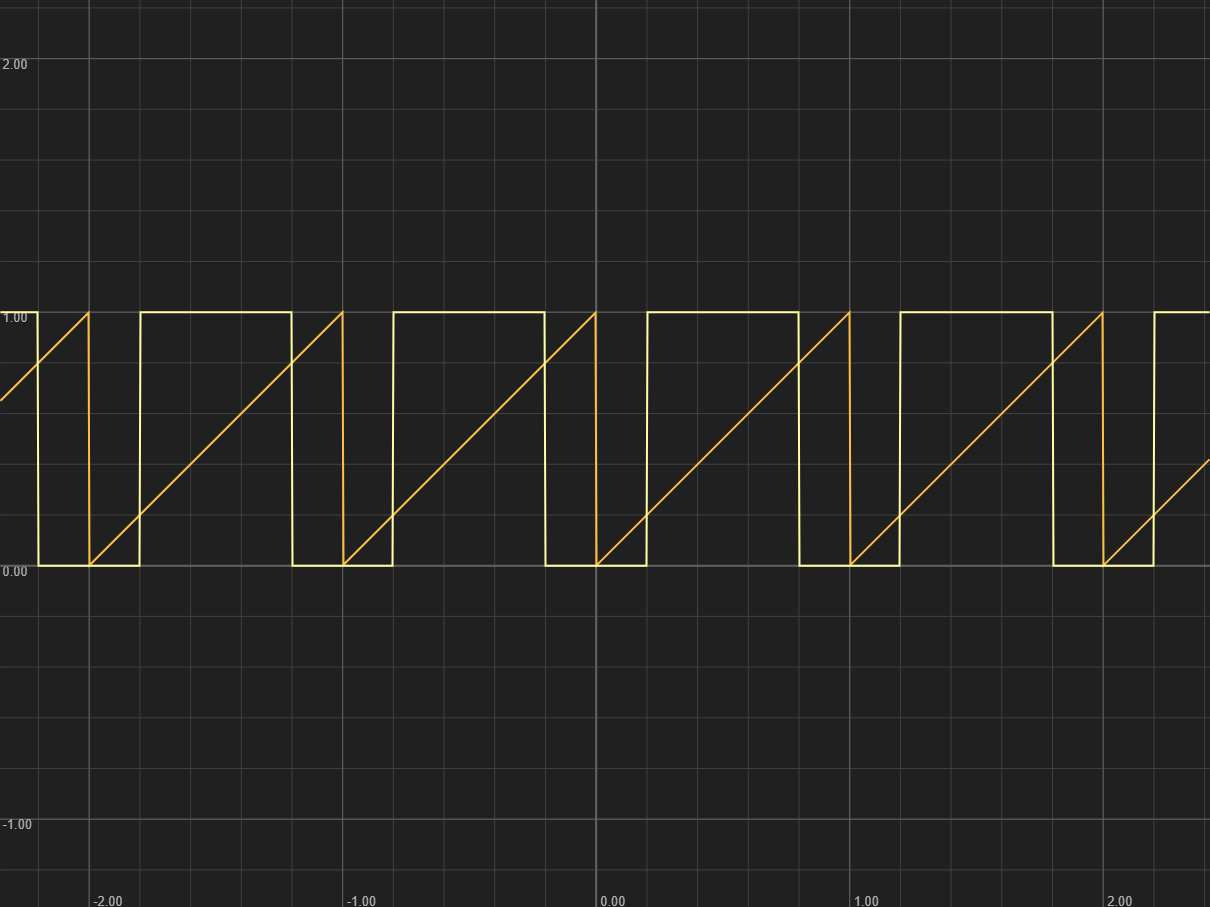
3 绘制周期性的条纹
// Create a periodic function
float px = mod(uv.x, 1.0/STEPS);

// The output is 1 if the pixel is in the interval:
// [0.5/STEPS - INTERVAL, 0.5/STEPS + INTERVAL]
color *= step(px, 0.5/STEPS + INTERVAL) - step(px, 0.5/STEPS - INTERVAL);
以下两个函数为例:
这样就可以的到一排周期性排列的条纹:
4 横向渐变
// Change the opacity of the x axis periodically
// Opacity oscillates between -1 and 1 by time
float fade_by_x_time = sin(iTime + uv.x);
color *= fade_by_x_time;
此处通过让 sin 函数随着时间 iTime 在 x 轴上移动,并与原来条纹的颜色相乘,这样一来颜色就有了横向动态渐变的效果了。
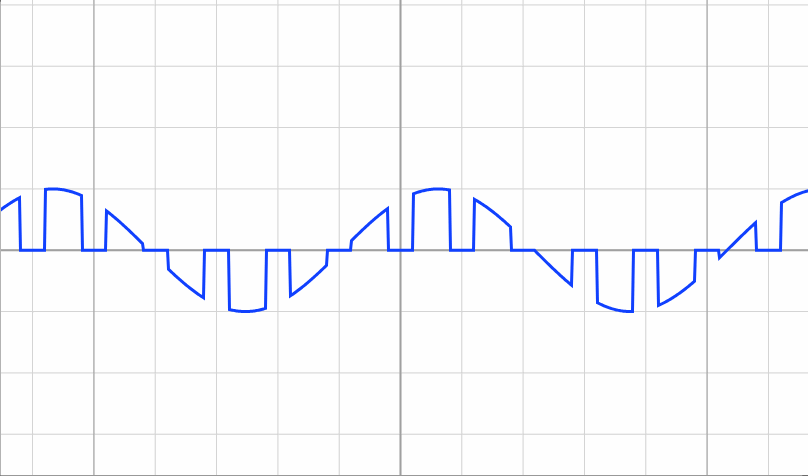
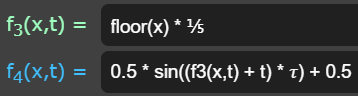
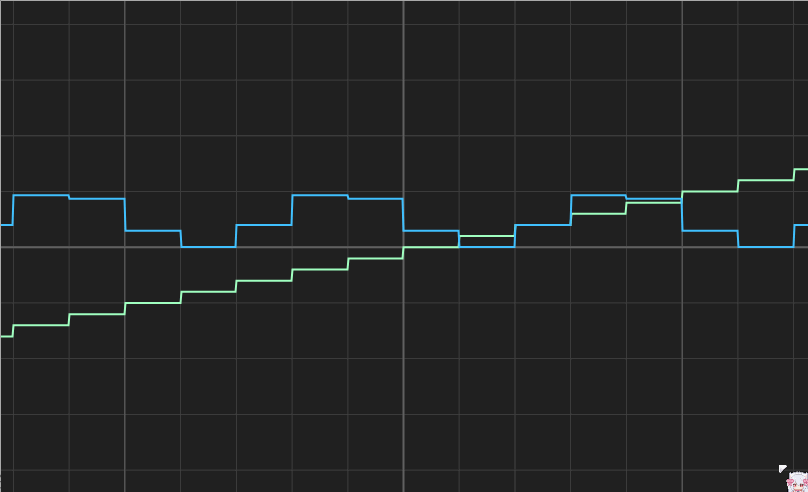
5 条纹的纵向变化
// Change the height of the wave periodically
float oscillate_y_by_time = abs(mod(iTime * FREQUENCY, AMPLITUDE) - AMPLITUDE * 0.5) * (0.5 * sin((sy + iTime) * TAU) + 0.5);
以下两个函数为例:
这里用了一个阶梯函数 floor 作为 sin 函数的输入,这样得出来的函数图形就会像一个阶梯状的sin函数。
6 最后三种效果相乘叠加就有了最后的效果:
class LoadingWidget extends StatefulWidget {
  final double? width;
  final double? height;

  const LoadingWidget({
    super.key,
    this.width,
    this.height,
  });

  @override
  State<LoadingWidget> createState() => _LoadingWidgetState();
}

class _LoadingWidgetState extends State<LoadingWidget>
    with TickerProviderStateMixin {
  int _startTime = 0;

  double get _elapsedTimeInSeconds =>
      (DateTime.now().millisecondsSinceEpoch - _startTime) / 1000;

  late final AnimationController _controller = AnimationController(
    duration: const Duration(seconds: 10),
    vsync: this,
  )..repeat();

  @override
  void initState() {
    super.initState();
    _controller;
  }

  @override
  void dispose() {
    _controller.dispose();
    super.dispose();
  }

  @override
  Widget build(BuildContext context) {
    _startTime = DateTime.now().millisecondsSinceEpoch;
    var width = widget.width ?? 100.0;
    var height = widget.height ?? 100.0;

      return SizedBox(
      width: width,
      height: height,
      child: FutureBuilder<FragmentShader>(
          future: _load(),
          builder: (context, snapshot) {
            if (snapshot.hasData) {
              final shader = snapshot.data!;
              shader
                ..setFloat(1, width)   // iResolution.x
                ..setFloat(2, height); // iResolution.y

              return AnimatedBuilder(
                  animation: _controller,
                  builder: (context, _) {
                    shader.setFloat(0, _elapsedTimeInSeconds); // iTime
                    return CustomPaint(
                      painter: ShaderPainter(shader),
                    );
                  });
            } else {
              return const CircularProgressIndicator();
            }
          }),
    );
  }

  Future<FragmentShader> _load() async {
    FragmentProgram program =
        await FragmentProgram.fromAsset('shaders/loading.frag');
    return program.fragmentShader();
  }
}
Links:Writing and using fragment shaders | Flutter Shady Flutter: Using GLSL Shaders in Flutter | Codemagic Blog javascript - What does `precision mediump float` mean? - Stack Overflow